INDUSTRY NEWS
How to Prepare for an Overnight Hike
How to Prepare for an Overnight Hike
by David Leslie on 13th August 2021
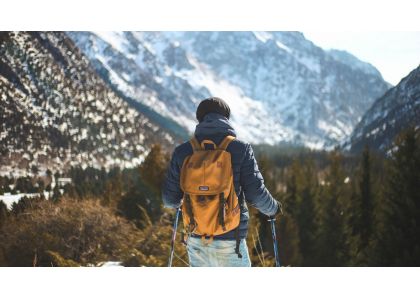
So, you’ve done a few day hikes and now you’re keen to take it to the next level. But how do you prepare for an overnight hike? What do you need to think about to not only keep yourself safe but to have an enjoyable time?
As a hiking instructor, I have taken thousands of students on their first-ever overnight experience, so I know a few things about what to pack and how to pack. Through practice, I have learnt the best way to prepare and have a list of top tips for beginners.
1. Keep it simple
Your first overnight hiking experience should be exactly as described, an “over-night” hike. This means heading off for just one night away or maybe two, but only if you feel up for the challenge. Keeping your first experience short and simple will give you a chance to get used to the trail lifestyle without being committed to an extended expedition. There is a lot to learn and get used to when hiking overnight, and your body will get a bit of a shock.
Walking while carrying a load is much more physically demanding. For an overnight hike, not only do you need to get used to the extended physical exertion but doing it while also carrying your pack. Then there’s the adjustment to sleeping on a lightweight mat and using all your other gear – tent, sleeping bag, head torch, hiking stove, poles, etc. Not to mention becoming accustomed to hiking foods. Your supplies need to be lightweight and preferably packed with nutrition and ingredients that give slow-release energy. Quality dehydrated meals or even dehydrating your own, are a much better choice than the ol’ 2-minute noodles.
2. Don’t walk too far!
Trailblazing with a fully loaded pack is very different from a day hike. Even if you consider yourself to be quite fit, you may find walking with a larger pack more difficult than your previous experience. Carrying a load forces your muscles to be used in different ways so they can accommodate the extra weight.
It’s essential to give consideration to your footwear and socks. It’s worth taking a moment during your preparation to make sure you have suitable shoe and a correct fit for your foot. Your feet are your most important asset when hiking and being ill-equipped will make or break your trip.
Most walks that I plan for beginners have been between 5 – 10km’s per day. They usually involve beginning your walk at morning tea time and ending your walk at lunchtime the next day. Use this timeframe and distance as a guide for your own planning and preparation.
Don’t try to tackle too many km’s on your first experience. You should be able to walk at a relaxed pace, take plenty of breaks, and enjoy yourself. Stop to appreciate the native wildlife and birds, yet still stroll into camp with at least an hour of daylight left.
3. Start locally
Keep your first hike close to home and do not attempt to walk off the track. Staying close to your town or city with easily navigated and clearly marked trails is wise. Save the remote ones for when you have gained knowledge and confidence, otherwise, you can put yourself into a dangerous situation.
Choose a trail that is interesting, picturesque, and allows you to build experience while ensuring your safety. Look for one that has a designated campsite with easy road access. This gives you the option to get assistance if you need it, especially as you get used to this “overnight hiking thing”.
4. Walk with a friend
I will always recommend that your first overnight hike should NOT be alone. Go with a friend, preferably an experienced friend that can offer advice and encouragement if needed.
Hiking alone can be a fantastic experience in self-reliance and independence, but it is much safer for beginners to go away with a friend or a group. If you do decide to travel alone, I recommend that you arrange to meet your friends or family at the campsite. Or you could at least make sure you walk in an area where you have full phone reception and sufficient vehicle access.
Take all the precautions of notifying any rangers in the area and leave your itinerary with close family or friends.
5. Stay hydrated
Your hydration needs will vary depending on the weather, environment and your body. Don’t underestimate how much water you will need and consider your electrolytes too. Consuming too much water can dilute the sodium levels in your body and lead to Hyponatremia. Learning how to manage your hydration needs and balance your fluid intake with powder or gel supplements is knowledge gained through experience.
A good rule to follow is 3 litres, per person, per day, and remember to allow extra water for cooking and cleaning your cookware. Of course, this can add to your pack weight quickly so try to pick an area where you can fill up with water along the way or at least at your campsite.
If either of those options aren’t available, you may need to organise a water drop to minimise the volume that you need to carry. This is where a friend or family member meets you at a pre-determined point to deliver a water refill.
6. Pick your season carefully
The weather can be quite unpredictable but try your best to plan your adventure for when the weather forecast is fair. Check the BOM website as part of your preparation and consider downloading their app so you can stay updated.
Temperatures hovering in the low to mid-20s, with fine conditions are ideal. Planning your first walk when it’s freezing cold and wet, or in the scorching heat is unlikely to support the amazing experience you were hoping for. It’s also smart to be aware of the warmer weather during late spring when snakes are emerging from their winter hibernation and can be more aggressive.
Remember that even if it’s a cool day and overcast, wear sunscreen and a hat when walking. And keep those fluids up with regular small sips rather than guzzling a whole bottle!
7. Think of safety!
Hopefully, you heed my advice above and choose a local trail with well-defined tracks and a clearly marked route. You will still need to take a map and compass to ensure you are heading in the right direction, so some basic map reading skills will be necessary. Alternatively, this could be another benefit of walking with an experienced friend or group.
8. Record your experience
One of the main reasons for going hiking in the first place is the thrill of venturing out into the wild. It provides us with an opportunity to reconnect with nature and appreciate some amazing scenery, as well as improve our fitness and mental health. So, take a camera or just your phone, and capture those beautiful moments to share with your friends and family when you get home.
A photo may speak a thousand words but don’t let that discount the value of journaling. Remember to take a notepad and pen, or if you have an artistic flair, why not pack a small sketchbook and a few pencils?
Not only will you be able to record your inspiration and thoughts, but you can make notes on what you wish to improve upon in future trips. Details about your walk, location, or gear are all useful. Or perhaps you might cross paths with another hiker who has some tips to share.
There are helpful mapping apps like Strava or Avenza that are GPS enabled and allow you to plot your route ahead of time and navigate as you go. Strava includes access to an online community and performance tracking features, but the extent of your usage can be tailored in your privacy settings.
Make sure you have a way to communicate – whether that be to check in with mates and loved ones, or an emergency device to give you peace of mind. For your first trip, try to pick an area that has good phone reception but if this is not possible, you may need to consider an alternative.
Devices like Satellite Phones, UHF handheld radios, PLBs and Satellite Messengers, provide extended coverage when mobile phone service is inadequate. PLBs are fantastic in emergency situations when you need to be rescued. Satellite Messengers give you the flexibility of being able to send an SOS alert, but also a text message to someone that lets them know you’re all good.
If you intend to hike regularly it may be worth purchasing your own, or some are available for hire from most good communications stores or even some ranger stations.
9. Practice minimal impact hiking
Quite simply, this embraces the concept of, take only pictures and leave only footprints. This means that you leave no trace of being there, you take out EVERYTHING that you took in. Leave no rubbish or food scraps behind at all!
No, the animals will not enjoy your scraps, and the scraps will not just rot away. In fact, some native animals can develop diseases from eating food that is not part of their intended diet. This also extends to going to the toilet. Some areas actually require you to carry out your “droppings”. So, when you are planning your first overnight hike, it can be a good idea to stick to an area that has toilets at the campground.
If nature does call along the trail, make sure you go at least 100m from any stream or waterway and that you follow the directions here. Everything should be buried completely.